Why Reels Are Not Showing in My Instagram After Update

Do you want to know "why reels are not showing on my Instagram after update". If you've updated your Instagram app and rings aren't showing up on your account, there are a few reasons why this could be happening.
First, it's possible that the update hasn't fully rolled out to your account yet. Instagram updates are usually rolled out in stages and it may take some time for your account to receive the latest version of the app. In this case, you can manually check for updates by visiting the App Store and searching for available updates for the Instagram application.
Another possibility is that there may be a technical problem with your app or device. In this case, you can restart your device or clear the cache and data of the Instagram application. You can do this by going to your device settings, finding the Instagram app and selecting the option to clear cache and data.
There may also be a temporary glitch or outage on Instagram, which is why Reels aren't showing up on my Instagram after the update. In that case, you can check if other users are reporting similar problems by searching for the problem on social networks or online forums.
Finally, it's important to make sure your Instagram account is in good standing and doesn't violate any community guidelines. If your account has been flagged for violating the guidelines, some features such as Reels may not be available to you.
If none of these troubleshooting steps worked, you can visit Instagram Customer Support for more help on "Why are my rings not showing up on my Instagram after updating?"
Instagram Reels is a popular feature that allows users to create and share short videos on the social media platform. However, some users may find that the Instagram circle doesn't show all the photos in their account after updating the app. This can be frustrating, especially if you rely on Reels to engage with your audience or promote your brand. In this article, we'll go over some common reasons why Reels on My Instagram isn't showing up on your account after an update, and give you some tips on how to troubleshoot the problem.
How to create Instagram circles?
Creating Instagram circles is a fun and engaging way to show creativity and connect with your audience. Here's a step-by-step guide on how to create Instagram circles:
Open the Instagram app and tap the camera icon in the top left corner of the screen.
Swipe left until you see the Reels option and tap on it.
On the left side of your screen, you'll see several tools you can use to create your loop, including a timer, countdown, and alignment feature.
Tap the record button to start recording your loop. You can record multiple clips by taking your finger off the record button and then tapping it again to resume recording.
Once you're done recording, you can use Instagram's editing tools to add music, text, filters, and other effects to your loop.
When you're done editing your loop, tap the arrow icon in the bottom right corner of the screen to go to the next step.
On the next page, you can caption, hashtag, and tag other users before sharing your reel to your Instagram feed, Story, or Reels tab.
And that's it! By following these steps, you can create and share engaging Instagram circles that showcase your creativity and connect with your audience.
How to fix reels not showing on my Instagram after update?
If you're wondering why rings aren't showing up on my Instagram after the update, here are some troubleshooting steps:
Check for updates: Make sure you have the latest version of the Instagram app installed on your device. You can check for updates by visiting the App Store and searching for Instagram.
Clear cache: Clearing the cache of the Instagram app can help resolve temporary issues that may cause Reels to not display. You can do this by going to your device settings, finding the Instagram app and selecting the option to clear cache and data.
Restart your device: Sometimes a simple restart can help fix technical issues with your device or the Instagram app.
Reinstall the app: If the above steps don't work, uninstall and reinstall the Instagram app on your device.
Check your account status: Make sure your Instagram account is in good standing and not violating any community guidelines. If your account has been flagged for violating the guidelines, some features such as Reels may not be available to you.
Contact Instagram Support: If none of the above steps work, you can contact Instagram Customer Support for further assistance.
By following these steps, you can troubleshoot and fix why my Instagram reels aren't showing after the update.
How to Download Draft Reels from Instagram Easy Steps & Techniques

Instagram Reels are so addictive that you can't stop watching them. You open one and suddenly 2 hours have passed. As fun as these reels are to watch, they are just as fun to make. However, it can sometimes be confusing where Rails drafts are stored once they are built.
Quick answer on finding drafts on Instagram rails
To find your draft rails, go to your Instagram profile and tap the rails icon in the Center. Finally, open the drafts folder to see all of your Instagram draft rails.
Instagram has a simple and user-friendly interface that saves your Rails drafts in one easily accessible place. There are handy icons to help you find your Rails drafts.
1. Find save draft reels using the New Reel option
The first method deals with how you can find your Rails drafts through the gallery option.
You just need to follow these 6 steps:
1. Open the Instagram app on your mobile device.
2. Swipe right on the screen or tap the "+" icon at the top.
3. Select the "REEL" option at the bottom.
4. Tap on the gallery icon in the lower left corner.
5. Tap on the “Drafts” option at the top. You will find all your Rails drafts there.
6. Select a Rails draft of your choice and edit or submit it.
2. Find a Rails draft repository using your profile
Another method discusses how you can use the draft option to easily find your rails.
Follow these 5 quick and easy steps to find your Reels drafts on Instagram:
1. Open the Instagram app on your mobile device. Tap the profile icon in the bottom right corner of your screen.
2. Tap on the rails icon in the center.
3. Tap on the "draft" folder; Here, you'll find all your Rails drafts.
6. Tap the track you want to view or edit.
last word
While creating Instagram Rails is fun, it can sometimes be confusing to know where your Rails drafts are stored. Rails are a relatively new concept to many Instagram users, so not everyone is used to the interface and how to use it. . but do not worry. We've introduced you to these three easy ways to locate your saved drafts on Instagram. So, now that you know how to find your Rails drafts, enjoy making Rails and bringing more creativity to the world. !
How to Get Instagram Music in My Region Without VPN On iPhone
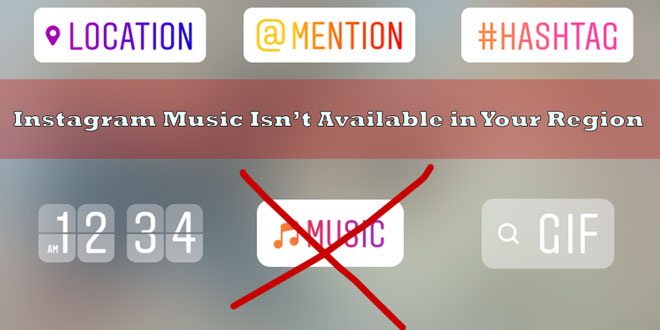
Solving the Instagram music story problem is an important issue for all the people who have faced it on this social network. This caused Tekrato to solve the Instagram Music Isnt Available in Your Region error in this article.
If you are one of the people who try to add music to their photo or video on Instagram, but the program does not allow them to do so, or if you are one of the people who do not have access to this feature and are looking to solve the Instagram Music error problem Isnt Available in Your Region,
Also, how to activate the music sticker in the Insta story is also an important issue that is discussed below. Instagram launched Music Sticker which allows users to add their favorite piece of music to a particular story to give a completely different look to the audience but this interesting Instagram music feature is not available or working for everyone.
Solving the Instagram music story problem
Solving the Instagram Music Story problem is an important topic that is explored in this section. If you also want to understand the reason why there is no music option in the Instagram story and learn how to activate the music sticker in the Insta story, stay with us. The next topic is to solve the Instagram Music Isnt Available in Your Region error. People who are facing this error should not worry because the way to fix this error is also given below.
Introducing Instagram's music story feature
By using music in Instagram story, when your friends watch your story, they can also hear the song while viewing a photo or video. They also see a label that shows the song title and artist name. New songs are added to the Instagram music library every day.
You don't need any other app apart from Instagram to add music to your stories. Instagram has provided an incredible opportunity to do just that with the Instagram Music tag. You can add the Instagram music tag to your stories to make them more interactive.
Instagram introduced the music tag so that users can add music to their stories. Also, the Instagram archive has a lot of music from which you can choose a music to publish in the story.
Music stickers are currently available as part of Instagram version 51 in select countries. Music can play an important role in how you share your moments and interact with friends.
How to activate the music sticker in the Insta story
Follow the steps below to add music to your Instagram story.
Update your Instagram app.
On the Home tab, tap the camera icon at the top of the screen.
Choose a photo or video for the story.
Tap the sticker icon at the top of the screen.
Now select the MUSIC tag.
Now select your favorite music from the displayed list. With the help of the tool, you can search for your favorite music.
Now you can see the music icon on your story. Select a part of the song by moving the music icon back and forth. The maximum time of your music can be 15 seconds.
Tap Done.
Solving the problem of not having the music option in the Instagram story
In the continuation of investigating and solving the Instagram story music problem, it should be said that many people are facing the lack of music option in the Instagram story. This has made them unable to use this important and special feature. To solve the problem of not having the music option in the Instagram story and the Insta Story Music Not Working error, you can use the following methods.
Update your Instagram
To enjoy music on Instagram stories and solve the Instagram story music issue, you need to get the update first. Install the latest version from the App Store or Google Play Store. Find Instagram and update it.
Exit the app and come back
If the music in the Instagram story still does not work, you are logged out of your account, close the program and then log in to your Instagram account again with the same information as before. This may solve your problem.
Reinstall Instagram
Delete your Instagram app and reinstall it to solve the Instagram Music Story problem. Usually, this method helps to fix the bugs in the link and mute the story.
Update Instagram using Wi-Fi
Sometimes updates are not possible without a Wi-Fi connection. So, try updating the Instagram app using your Wi-Fi. Open your settings, click on Wi-Fi and find a network to connect to. Enter the password, connect to Wi-Fi and update your app. Doing this will help you to have a music Instagram story.
Change your account to personal
Maybe you are using Instagram Business account, so you can try to change your account back to personal and enjoy Instagram Music in Story feature again. To return:
Go to Instagram settings
Go to the Account section
Choose Switch to Personal account option.
With this method, your problem will be solved.
Why Does Instagram Crop My Photos When Posting Multiple
Instagram has a maximum aspect ratio of 4:5 on vertical posts (four pixels wide for every five pixels high). Instagram limits very tall images that take up too much vertical space in the feed. While it's great that Instagram stops users from making large, obtrusive posts, the 4:5 limit means you can't post a full vertical photo or video you've shot on your phone to Instagram.
If you want to post your entire image on Instagram but it's taller than the 4:5 aspect ratio, you'll need to edit your image before posting. Otherwise, Instagram will automatically crop your image up to 4:5. I recommend the Kapwing resize tool because it allows you to add white space on both sides to get your image to the required aspect ratio.
Upload image
Resize to 4:5
Download and send to Instagram
Step 1: Upload the image
Start by opening Kapwing's Resizer tool on your phone or computer. Upload your image file from your camera roll or import it from a URL. Kapwing supports images, videos, and GIFs, so you can use it to resize any type of media.
Once your photo is loaded into the editor, you'll be taken to the Kapwing Studio editor, where you'll see a preview of your image in the center of the screen.
Step 2: Change the size to 4:5
In the Output Size section, select 4:5. This allows your photo to take up maximum vertical space in the Instagram feed without shrinking in size. There is a resizing option for Instagram, 1:1, but this will shrink your image to fit the default square shape.
After choosing a size option, Kapwing will add white padding to the sides of your image to match the 4:5 aspect ratio. You can change this white background to any color you want to make it stand out in your Instagram feed.
Step 3: Download and submit
Click the red Export Image button at the top of the page. After a few moments of processing, Kapwing will make your resized or 4:5 image available for download. If you're using a desktop computer, iPhone, Android, or tablet, you can download the image to your photo gallery immediately after it's published.
If you're not signed in to your Kapwing account, sign in or register using your Google or Facebook account – once you're signed in to your Kapwing account, the checkmark in the lower right corner will be removed from your final image.
Open the Instagram app and upload your image. You'll notice that Instagram squares the image by default, but you can click the spread arrows or pinch the image in the lower left to fit the entire image on Instagram. When you publish it, Instagram will resize the image to fit the screen, and your entire photo will appear on Instagram without cropping.
Result
This tutorial will show you a solution to send complete portrait photos and videos on Instagram. You can use Resizer Kapwing to post multiple images of different sizes to Instagram, add a thin white border around your media, and post TikTok and Snap videos.
Why Am I Getting Ads on Instagram All of a Sudden

Removing Instagram ads has become one of the main needs of users of this social network.
Instagram is one of the top social networks, attracting more than 1 billion users.
Instagram is currently one of the most important advertising channels. All these advertisements are presented in the form of different posts and stories.
Although business pages are looking to advertise their products on Instagram. Sometimes Insta ads are very bulky and heavy. This can be a very negative factor for users' data volume. This is why users are thinking of removing Instagram ads.
What are Instagram ads?
You must have seen posts on this social platform that have the words Sponsored or Ads under them.
When you see these words under the username of the pages, it means that the post has an advertising aspect.
Every post on Instagram is not published for advertising purposes. Rather, they are only advertising posts that have the two words Sponsored or Ads.
Also, advertising posts are completely managed by Instagram.
The photos of advertising posts have different dimensions.
How to remove Instagram ads?
There are no reliable and 100% ways to block ads on Insta, and today this platform actually earns money from ADS and does not allow you to block all of its ads. But you can control them to a large extent.
If you are an active user of Instagram, you have definitely come across advertising posts on the main page of the program, and these posts must have been annoying to you over time. Next, we will tell you how to remove advertising posts.
This method is done exclusively for each advertising post. If you do this method for 3 to 4 advertising posts every day, all ads will be removed for you in a short period of time. Deleting Instagram ads is very easy.
Close Instagram ads
The first method to delete Instagram ads
Just follow the steps below to remove Instagram ads.
Enter the Instagram application and go to the main page (Home).
In the main part of the application, check the published posts. When you come across the first advertisement post, click on the three dots icon next to it.
In the menu that opens, select Hide.
Next, you will be shown a menu that includes the following options.
It's not relevant: The published ad is not relevant in any way.
I see it too often: The published ad is displayed too often for me.
It's inappropriate: The ads that have been waiting have inappropriate content.
Then you choose one of those three options.
By doing these steps, that ad will be removed for you.
In addition, Instagram will send you a message. Thank you for reporting the issue.
The second way to delete Instagram ads
Be careful that in this method, the removal of ads on Instagram is not done permanently. Rather, this method only reduces the amount of advertising.
To use this method, follow the steps below.
Go to your profile and click on the three line icon to open the menu for you.
Click on the gear icon which is the Instagram settings section.
On the page that opens for you, click on the Ads option.
A page as below will open for you. Click on the Ad Topic Preferences option, which means (Instagram's preferred ads).
Select all four options and click Save.
By doing these steps, you were able to reduce Instagram ads to some extent.
Prevent Instagram ads from opening automatically
If you have connected your Instagram account to your Facebook, you will definitely see many advertising messages. So if you want to see fewer ads, disconnect your Facebook account.